As an Amazon Associate, we earn from qualifying purchases. Some links on this site are affiliate links at no extra cost to you. Our recommendations are based on thorough research and editorial judgment.
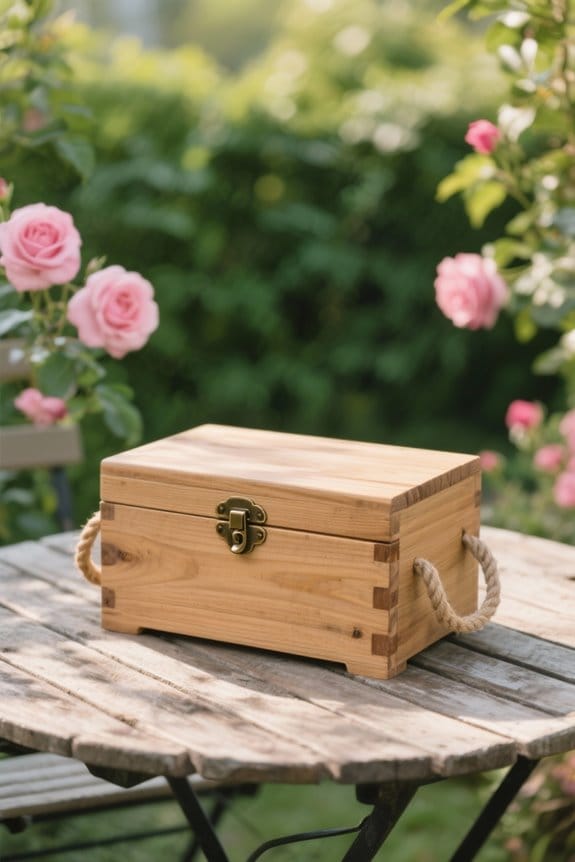
How to Build a Hose Storage Box to Hide Clutter
To build a hose storage box that hides clutter, gather three 1 x 6 x 8′ cedar boards and two 2 x 2 x 8′ pressure-treated boards. Start by constructing a sturdy bottom frame with eight 1 x 3 lumber pieces, followed by assembling side walls using wood glue and screws. Install a hose reel within a properly sized access opening. Seal the box with outdoor timber oil for weatherproofing and place it in a shaded area to prolong its life. Further steps are available for enhanced functionality.
Key Takeaways
- Select high-quality, water-resistant materials like cedar and pressure-treated wood for a durable and moisture-resistant hose storage box.
- Construct a sturdy frame and secure walls, ensuring tight connections to enhance stability and organization.
- Create an access opening for the hose and install a hose reel for easy usage and to keep the space tidy.
- Seal and weatherproof the box to protect against UV damage and moisture, extending the life of your hoses.
- Choose a flat, shaded location for placement, ensuring easy access to spigots while complementing your garden’s aesthetic.
Understanding the Need for Hose Storage
Proper hose storage is essential for any garden enthusiast, as it greatly contributes to the overall organization and safety of the outdoor space. Properly stored garden hoses prevent visual disorder, maintaining an appealing landscape. Hose storage options, such as a wooden hose storage box, offer budget-friendly solutions that can be assembled with minimal tools and materials. A secure storage solution also protects hoses from damaging sunlight and excessive wear, extending their usable life considerably. Additionally, neatly arranged hoses reduce tripping hazards during outdoor activities, thereby enhancing safety. An organized garden makes it easier to access hoses when performing essential maintenance tasks, such as watering plants or cleaning the patio, ultimately improving the efficiency and enjoyment of gardening endeavors. For those considering irrigation systems, the use of 1/2 polyethylene tubing ensures durability and compatibility with various fittings, facilitating efficient installation and operation.
Supplies Needed for Your Hose Storage Box
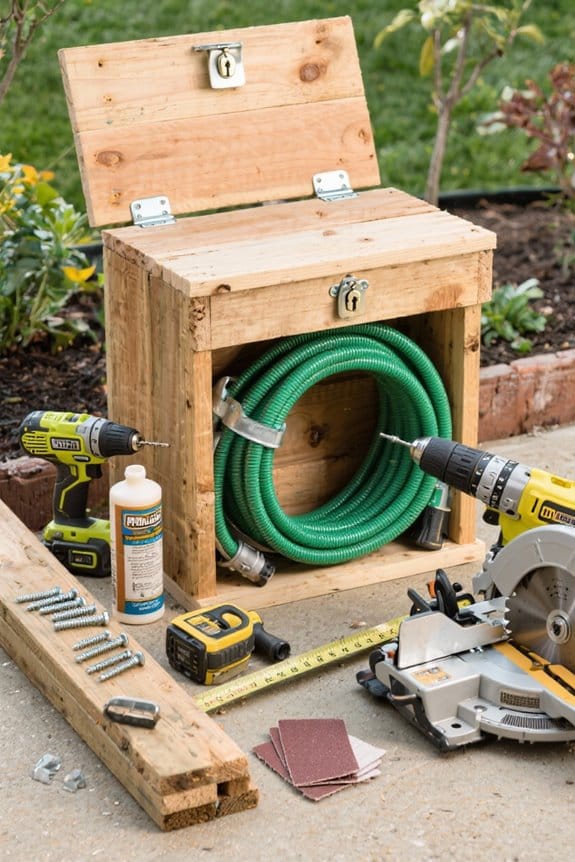
Building a hose storage box requires selecting the right materials to guarantee durability and functionality. To create a sturdy design, three 1 x 6 x 8′ cedar boards and two 2 x 2 x 8′ pressure-treated boards are vital. These materials resist moisture and weathering, ensuring longevity. Additionally, 2 ½” decking screws are essential for securing the wooden structure, enhancing its strength against outdoor conditions. A drill fitted with a 1 ½” Forstner bit allows for accurate hole creation, providing necessary access for the hose. Magnetic cabinet latches are recommended to keep the box securely closed while permitting convenient access. Finally, applying outdoor timber oil protects the wood from UV damage, making it a practical element in effective hose storage ideas. Installing self-draining mechanisms in your hose storage box design can further enhance its functionality by preventing water buildup and potential damage.
Recommended Products

Comfortable Rollback Design: The rollback design offers exceptional comfort; seat fully rolls at the bottom and top of the backrest for ultimate relaxation

Fasten on the edge of the deck board to provide a clean, professional, deck top
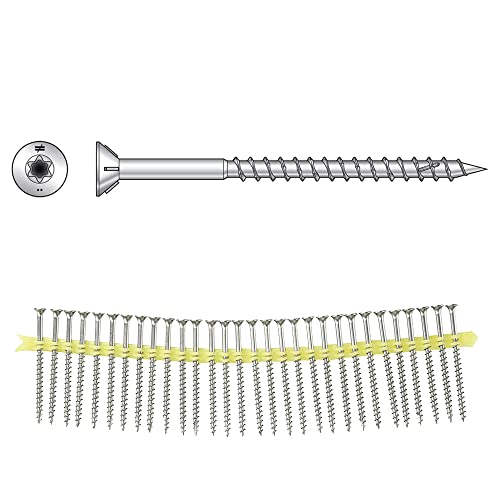
EXTERIOR-READY PERFORMANCE: Deck-Drive DWP collated wood screws are measured at #10 x 2-1/2 in. and engineered for exterior wood-to-wood fastening, including decking and framing. They deliver dependable holding strength in pressure-treated lumber and common outdoor building materials.
Starting With the Bottom Frame

Begin by cutting eight pieces of 1-by-3 lumber to create the bottom frame of the hose storage box, guaranteeing that the lengths correspond to the desired dimensions for coiling the hose. A common example is a frame measuring 17 inches in width and 18 inches in height, which accommodates a 100-foot coiled hose. Next, assemble the bottom frame by securing the corner joints with screws to guarantee added stability, essential for supporting the entire structure. Measure and cut two pieces of 1-by-2 lumber to serve as internal supports, reinforcing the bottom frame against pressure from the coiled hose. Finally, check that each connection of the bottom frame is tightly secured, creating a sturdy foundation as the first step in effective storage solutions. Ensure the installation site is dry and weather-resistant, similar to the guidelines for outdoor lighting stakes, to prevent deterioration of the hose storage box over time.
Building the Side Walls

Crafting the side walls for the hose storage box involves precise measurements and sturdy materials to guarantee lasting durability. Begin by applying wood glue to two parallel 2-by-2 boards, which will provide essential structural support. Align the ends of three 1-by-6 boards smoothly with the edges of the 2-by-2 boards, making certain a stable wall structure. To enhance durability and prevent wood splitting, drill pilot holes through the 1-by-6 boards before securing each with screws. Repeat this process for the second side wall to make sure both walls maintain symmetry and are consistent in size. Finally, verify that the bonding is solid by checking the alignment and fastening of all components, vital for the overall structural integrity of the hose storage box. Consider integrating an automatic plant waterer to manage hydration efficiently when designing your garden setup, which could complement the functionality of your hose storage.
Attaching the Walls Together

Attaching the walls of the hose storage box requires careful alignment and secure fastening to guarantee a sturdy structure. Begin by laying one side wall facedown, applying wood glue to the 2-by-2s for added strength during assembly. After this, secure the ends of the side pieces flush with the edges of the 2-by-2s by drilling pilot holes, then fastening them with screws. This process should be repeated for the second side wall to maintain symmetry and structural integrity. Once both side walls are prepared, lay one down, apply glue, and attach the front board upright using screws, followed by the back wall. Finally, fit the second side wall between the front and back walls, securing everything tightly with screws. To ensure long-lasting outdoor use, consider using high-quality materials like durable resin or metal that withstand harsh weather conditions.
Creating the Hose Access Opening
Creating a functional hose access opening is crucial for ease of use and efficiency in the hose storage box. Mark the desired location on the top board to assure the opening is large enough for feeding and retrieving the hose easily. Use a Forstner bit to drill a hole in the side walls, allowing the hose to pass through smoothly without friction. Cut a rectangular or circular opening in the top board that aligns with the drilled side holes. It is important to reinforce the edges of the hose access opening with weatherproof paint or sealant to protect against moisture. Finally, double-check the alignment before installation to guarantee smooth winding and unwinding when you store your hose. Adding consistent moisture to your garden not only benefits your hose storage but also ensures healthy growth for plants like Allium bulbs, which require consistent watering.
Recommended Products
All-Weather Durability: Pro-Tect tested and proven to withstand up to 3,700 pounds or 30 inches of snow load, and winds up to 100 mph (product must be anchored as specified in the Backyard Discovery instruction manual); Patent pending

【All-In-One Multipurpose Workstation】 Integrates an extra-large 47x24x35-inch deep single bowl, full-length drainboard, sturdy workbench(supports up to 350 lbs), and a reinforced water-resistant storage cabinet into one complete unit. This dynamic layout transforms a simple wash basin into a highly efficient prep, wash, and dry zone. Maximize your workspace and seamlessly streamline heavy chores in demanding environments.

【Efficient Rainwater Harvesting】 Perfectly designed to collect and store rainwater from your gutter system. An eco-friendly solution for gardening irrigation and outdoor water management
Installing the Hose Reel
Installing the hose reel requires careful attention to detail to guarantee reliable functionality and ease of use. First, assemble the hose reel using durable 1-by-6 inch boards, and secure it with 2-by-2 inch reinforcements for added stability. It is essential to position the reel correctly, ensuring it spins freely. This alignment facilitates easy winding and unwinding of the hose. To provide hose access, drill a precise opening in the top board of the storage box with a Forstner bit for clean cuts. After placing the reel, connect quick-connect fittings** to the hose for a secure attachment** to the spigot. Finally, secure the hose reel assembly inside the box with screws, adjusting pipe placement for ideal functionality.
Finishing Touches for a Smooth Surface
Achieving a smooth surface on the hose storage box enhances both its aesthetic appeal and overall safety. Begin by using medium-grit sandpaper, focusing on rough edges and surfaces; this step guarantees all areas are sanded evenly. Shift to fine-grit sandpaper for a final pass, creating a silky texture that improves the wood’s appearance. Pay special attention to corners and joints to prevent splintering. Additionally, a heat torch can add a unique charred effect, which not only decorates but may contribute to weatherproofing. Once the surface feels smooth, apply a layer of weatherproof paint or outdoor timber oil. This will effectively protect the wood from moisture, UV damage, and will keep the hose neatly stored and organized. For gardening enthusiasts, integrating ergonomic design elements in garden tools can significantly enhance user comfort and reduce strain during tasks.
Sealing and Weatherproofing Your Box
Once the surface of the hose storage box has been sanded to a smooth finish, attention turns to sealing and weatherproofing to guarantee durability. To protect against moisture, all surfaces require a weatherproof sealant or outdoor timber oil. High-quality, water-resistant materials, like cedar wood, are advisable since they inherently resist rot and decay. The sealant should be applied generously and allowed to cure for the manufacturer’s recommended time, commonly between 24 to 48 hours. To maintain protection, regular inspections and annual reapplication of the sealant or oil are essential. Additionally, for enhanced weatherproofing, consider installing a waterproof lid and using rubber gaskets around openings to further shield the hose storage box from rain and UV exposure. Drip irrigation systems can offer significant water savings, making them a sustainable choice for garden water management.
Recommended Products

All-Weather Durability: Pro-Tect tested and proven to withstand up to 15,900 pounds or up to 30 inches of snow load, and winds up to 100 mph

All-Weather Durability: Pro-Tect tested and proven to withstand up to 15,700 pounds or up to 30 inches of snow load, and winds up to 100 mph*

All-Weather Durability: Pro-Tect tested and proven to withstand up to 14,800 pounds or up to 30 inches of snow load, and winds up to 100 mph
Placing Your Hose Storage Box in the Garden
Selecting the right location for a hose storage box is vital for both functionality and the longevity of the hose. Choose a shaded area to protect the hose from direct sunlight, which can degrade its material, even with a lid. Confirm the hose holder is easily accessible, ideally positioned near spigots to minimize tangling and make watering efficient. A flat, stable surface is essential to prevent tipping and maintain durability. When determining placement, consider the garden’s overall aesthetics; the storage box should complement the landscaping without detracting from the visual appeal. With careful thought and planning, a hose neatly stored in this box enhances both the organization of the garden and the efficiency of watering tasks. Additionally, using non-GMO heirloom seeds in your garden can promote a healthier ecosystem and ensure robust plant growth, complementing the overall aesthetics and functionality of your garden space.
Recommended Products

UNDERHILL HC-HT-100 HOSE CADDIE CART: Holds over 100 ft of 1-Inch hose. Our hose reels for outside are ideal for professional lawn maintenance on sports, soccer, and baseball fields. Made in USA.
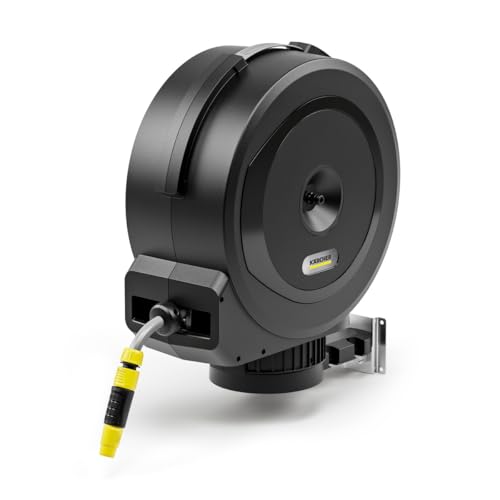
No screws, no tools, no stress: with the unique Kärcher FlexChange system, the hose box can be removed from the wall mount or ground spike in seconds (e.g. in winter).

Automatic roll-up: With the rechargeable battery, the 35m hose pipe is automatically retracted at the touch of a button. RollControl+ & hose guide ensure controlled retraction without tangles
Frequently Asked Questions
How to Neatly Store Hoses?
Effective hose organization tips include utilizing custom outdoor storage solutions like stylish storage boxes, ensuring hoses are coiled and protected. This approach promotes a clutter-free gardening environment, enhancing the aesthetics and functionality of outdoor spaces.
How to Bundle up a Hose?
To bundle up a hose, utilize effective hose winding techniques, create neat loops, and secure with a hose reel option. These outdoor organization tips help prevent tangling and maintain a tidy storage area.
How to Store a 100 Foot Garden Hose?
To store a 100-foot garden hose effectively, consider hose reel options or creative storage solutions. Implementing hose maintenance tips guarantees longevity, while proper placement away from direct sunlight protects the hose from UV damage.
What Is the Best Storage for Hose Pipes?
The best storage for hose pipes includes various hose reel types, such as wall-mounted options, alongside garden hose accessories like hose pots. These solutions offer effective organization and space-saving benefits for any garden layout.
