As an Amazon Associate, we earn from qualifying purchases. Some links on this site are affiliate links at no extra cost to you. Our recommendations are based on thorough research and editorial judgment.

Building a Rain Barrel Stand for Gravity-Fed Irrigation
To build a rain barrel stand for gravity-fed irrigation, use durable materials like treated wood or cinder blocks. The base should measure at least 24 inches square for stability, preventing tipping during use. Elevate the barrel 12 to 36 inches to increase water pressure for irrigation. Firmly brace the support legs to guarantee stability in various weather conditions. Regular inspections are necessary to check for wear, and adding fasteners enhances durability. Discover additional steps for completing your setup.
Key Takeaways
- Construct the stand from durable materials like treated wood or cinder blocks for long-lasting use and stability.
- Ensure the base of the stand is a minimum of 24 inches square to prevent tipping and enhance support.
- Elevate the rain barrel 12 to 36 inches for increased water pressure, facilitating efficient gravity-fed irrigation.
- Firmly brace support legs to enhance stability and withstand various weather conditions and loads.
- Regularly inspect the stand for wear and reinforce with fasteners to ensure safety and durability over time.
Selecting the Ideal Location for Your Rain Barrel
When selecting the ideal location for a rain barrel, homeowners should prioritize a stable, level area that facilitates easy rainwater collection. Positioning the rain barrel near existing downspouts is essential, as this allows for efficient water transportation and enhances overall water distribution. Observing roof water flows during rainfall can help identify the best placement to direct runoff effectively. In addition, the site should be away from areas prone to high debris accumulation, which may clog the system and diminish water flow efficiency. Considering solar exposure is also important, as it can influence plant growth and the efficiency of a gravity-fed irrigation system. Together, these factors contribute to a functional and effective rainwater harvesting setup. For optimal performance, consider that some solar-powered lights can provide additional lighting without the need for traditional electricity, enhancing both security and efficiency around your property.
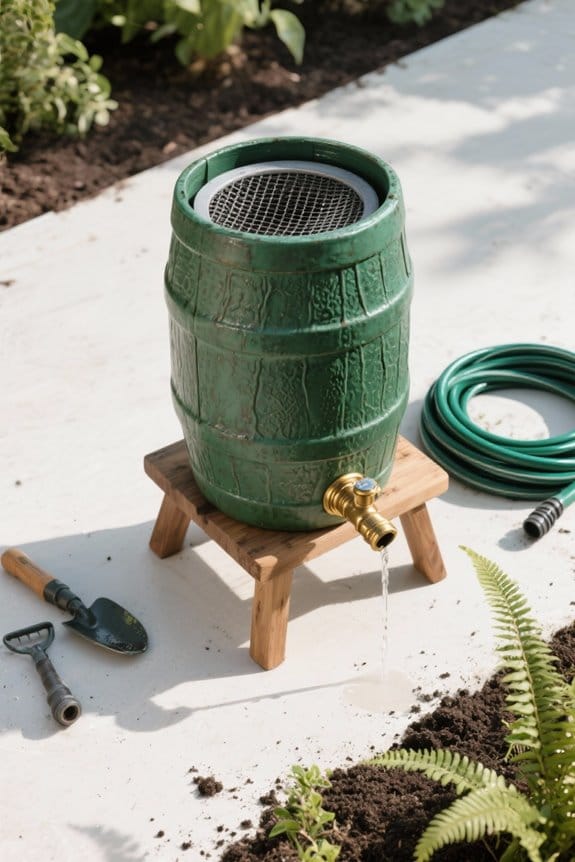
Building a Sturdy Stand
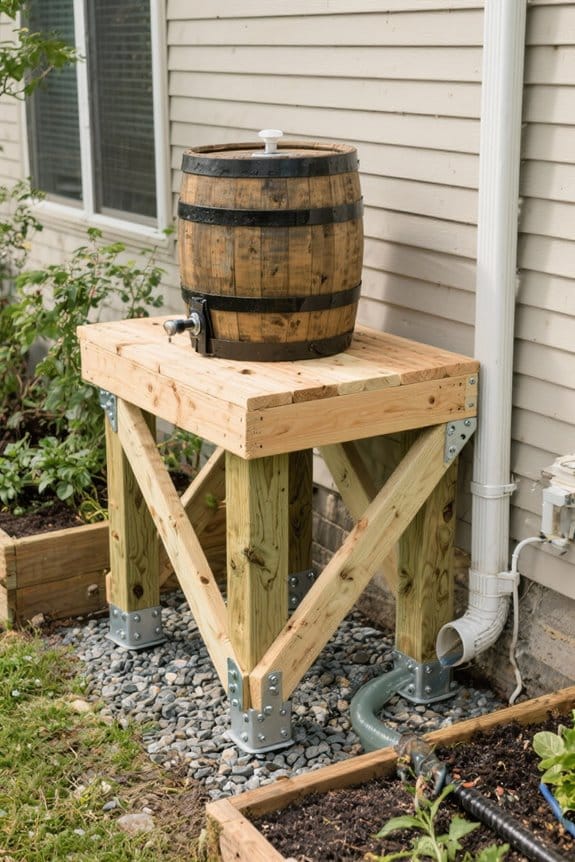
A sturdy rain barrel stand is vital for proper rainwater collection, ensuring that the barrel is both accessible and stable. This stand should be constructed from durable materials, such as treated wood or cinder blocks, to support the weight of a full barrel, which can approach 500 lbs. The base must be at least 24 inches square, providing a level platform that promotes stability and prevents tipping. Support legs should be firmly braced, enhancing stability, especially in windy or uneven conditions. Elevating the rain barrel by 12 to 36 inches increases water pressure, optimizing gravity-fed irrigation systems. Regular inspections for wear or instability are essential, and adding fasteners or straps contributes additional safety and durability to the stand. When considering tools for constructing the stand, using ergonomic gardening tools can reduce fatigue and enhance efficiency.
Recommended Products
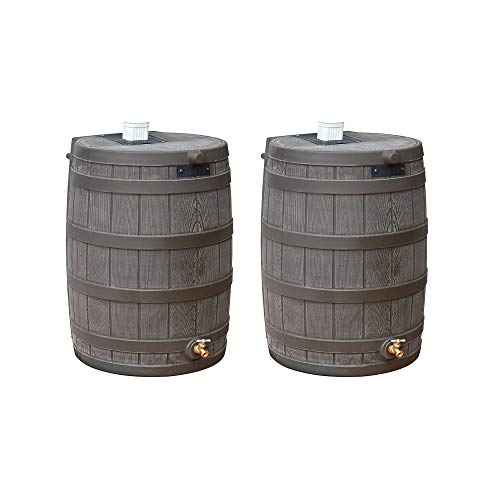
Catch and store rainwater in this faux wood rain barrel
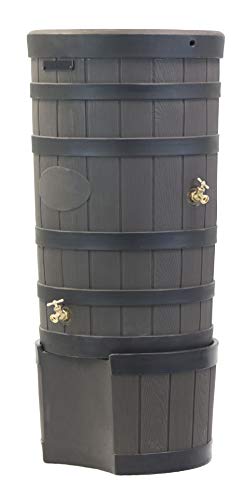
50 gallon capacity rain barrel
Preparing Your Rain Barrel for Use
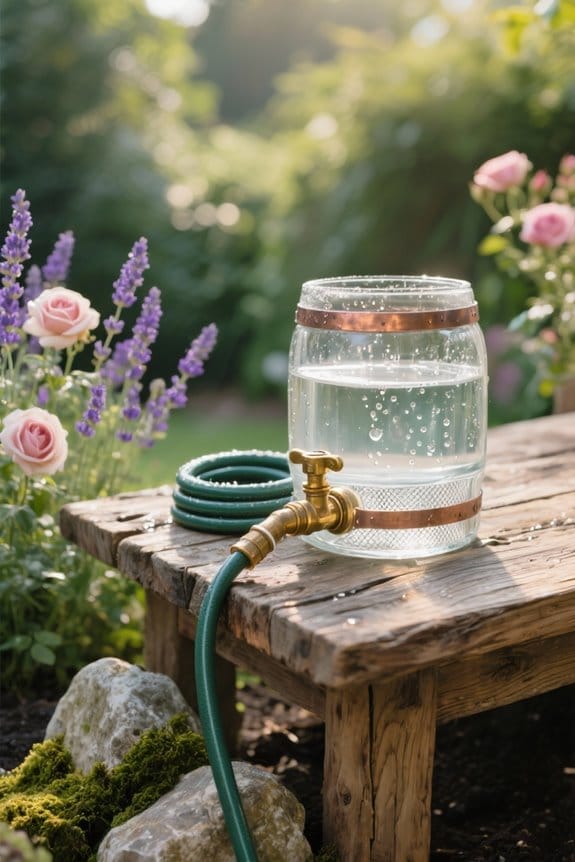
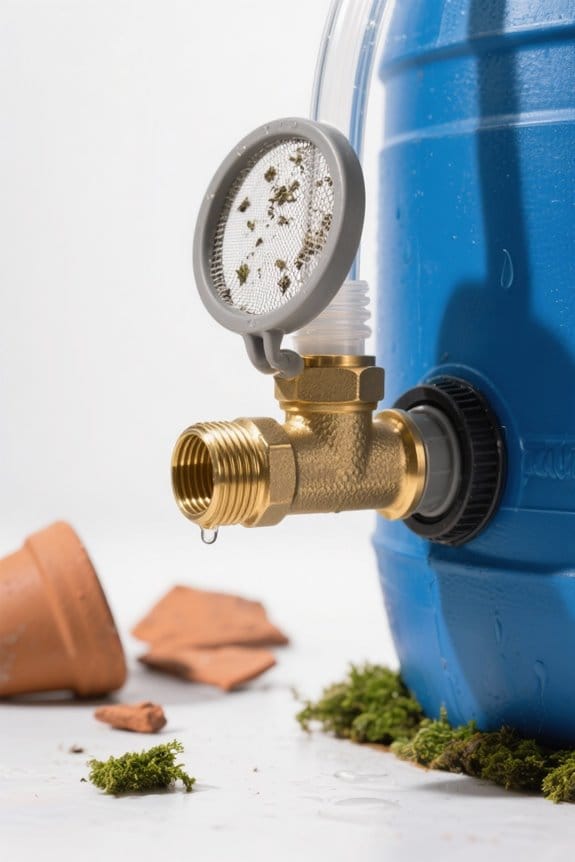
Preparing a rain barrel for use requires careful consideration and methodical steps. First, confirm the chosen rain barrel is chemically safe for gardening to prevent water contamination. The discharge hole should be modified to fit the desired outlet size, utilizing silicone sealant to secure any ABS components for a leak-proof system. Installing a ball valve at the outlet allows for precise control over water discharge, meeting various water needs. An access hole should be created for maintenance, preventing debris accumulation. Additionally, attach a 100-micron inline filter to the rain barrel’s drain valve to protect drip irrigation tubing and emitters from clogging. These preparations guarantee maximum functionality of a gravity-fed irrigation system, facilitating efficient gardening. To ensure your gravity-fed system remains effective, consider incorporating an anti-siphon valve to prevent backflow contamination and maintain water quality.
Recommended Products

XFITTING Expansion compatible with all types and brands of PEX A Tubing, Uponor(Wirsbo), Sious Chief, Etc.

HEAVY-DUTY 3-LAYER PVC — Premium 2000D PVC-coated polyester mesh (0.9 mm thick) with double-sided coating for superior puncture, tear, abrasion, UV, and antistatic resistance.

THE ORIGINAL Soft-Sided Rain Barrel: My ECO Barrel is a BPA-free sustainability product. Structurally superior to competing products: 0.022in. thick (.55mm) ClimaFabric a UV-resistant reinforced 1000D PVC fabric (ClimaFabric) with high-frequency welded seams
Installing the Water Diverter
With the rain barrel prepared for use, attention now turns to installing the water diverter, an important component in enhancing rainwater collection. First, align the downspout diverter with the downspout to maximize collection efficiency and prevent blockages. Incorporate a leaf diverter to filter out debris, ensuring easy access for cleaning. Next, modify the discharge hole of the rain barrel to securely fit the diverter’s outlet, applying silicone sealant around the edges to prevent leaks. It is essential to regularly check both the diverter and barrel for any maintenance needs. Finally, confirm that the height of the setup allows for effective gravity-fed drip irrigation, ensuring stability while optimizing overall water usage for rainwater harvesting. Consider integrating a durable, weather-resistant design to ensure the system’s longevity and reliability in varying conditions.
Recommended Products

Dimension - 11.6 x 9 x 5.7 in.

Effective roof runoff control: Engineered with a scientific diversion angle and a precision upturned flange, this 39-inch roof rain diverter is designed to master heavy rainfall. The unique flange design effectively captures high-velocity water, preventing it from overshooting the eaves and redirecting it away from roof valleys and entrances to keep your home’s exterior dry

Our Inline Diverter allows you to place your rain barrel in front of your downspout for filling.
Connecting to Your Downspout
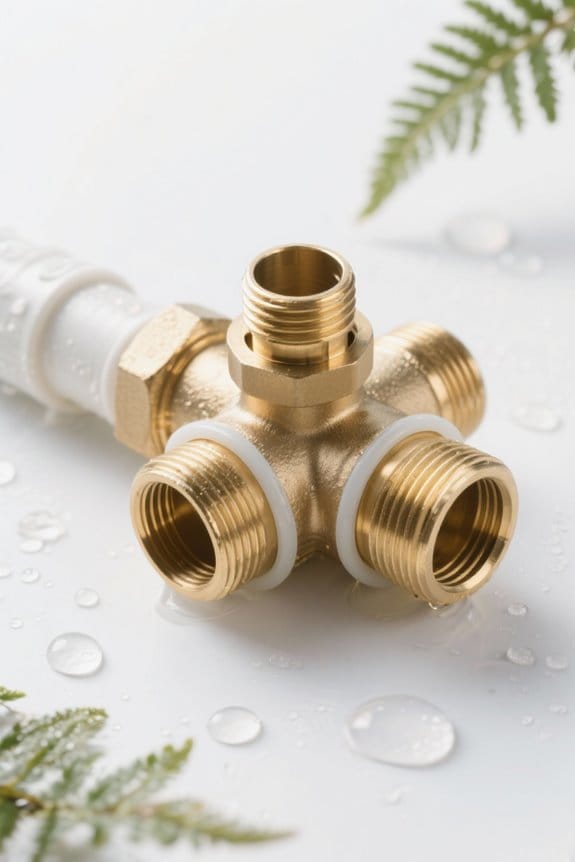
Connecting a rain barrel to a downspout is a critical step that considerably enhances rainwater collection efficiency. To begin, position the rain barrel within five feet of the downspout to maximize water transfer. It is vital to incorporate a leaf diverter to filter debris, guaranteeing unobstructed flow into the barrel. The downspout must be properly aligned with the barrel’s inlet, preventing leaks and potential overflow issues. Regular maintenance of the leaf diverter is necessary; check it monthly to avoid blockages. Additionally, verify that any modifications to the downspout comply with local building codes, which helps avoid legal complications. This careful setup guarantees a reliable, gravity-fed irrigation system that allows you to effectively water your garden. To further enhance the system, you might consider adding a ball valve for efficient water management; it allows for customized irrigation setups and increased durability, reducing the frequency of replacements.
Recommended Products

Rain Barrel: Add style and beauty to your outdoor space while helping the environment by conserving water with this set of 4 50-gallon rain barrel

Includes rain barrel and diverter

Theft-Resistant & Cost-Saving: Made entirely from high-strength plastic, the downspout nozzle removes the risk of metal theft and costly replacements. It’s ideal for properties in high-theft areas, offering a smart, low-cost alternative that stays in place for years.
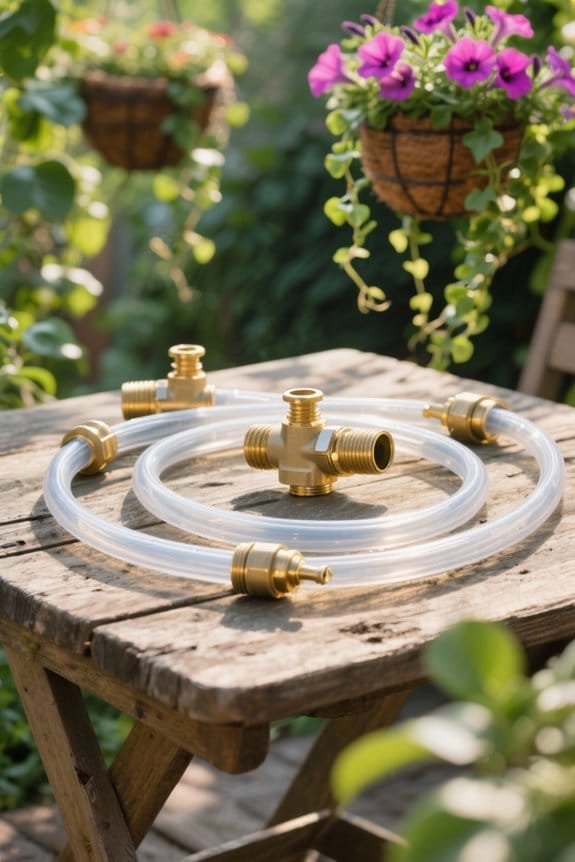
Setting Up Feed Lines for Your Garden
After establishing a solid connection to the downspout, the next step involves implementing feed lines to distribute collected rainwater efficiently to the garden. Utilizing ½” poly tubing guarantees ideal water coverage and flow for deep watering. To enhance irrigation effectiveness, small holes should be drilled into the poly pipes, facilitating water dispersion throughout the planting area. Placement of the tubing must remain below the waterline of the rain barrel to guarantee consistent water flow and to prevent backflow issues. Additionally, friction capping should be applied at the ends of the feed lines, allowing for easy sediment cleanup and maintenance. For winterization, it is critical to disconnect the system to prevent freeze damage to the feed lines and drip emitters. Using a reliable pipe cutter to trim the poly tubing to the desired lengths ensures clean and precise cuts, which enhances the overall functionality of the irrigation system.
Recommended Products

MATERIAL: Made from premium grade white polyethylene (PE), this tubing offers durability and long-lasting performance for irrigation applications.


Testing Your Gravity-Fed System
Testing a gravity-fed irrigation system is essential to guarantee peak performance and efficient water delivery. Begin by opening the ball valve to check if water flows consistently through the lines and emitters. Observe the flow rate, ensuring it matches the required specifications for your emitters; low pressure may cause dry zones or uneven watering. Conduct a visual inspection for any blockages in the emitters, and flush the system if necessary to maintain proper flow. Adjust the emitter spacing or rain barrel height, ideally between 2 to 4 feet, to optimize water delivery. Regularly check for sediment buildup in the inline filter, flushing it to prevent restrictions and help increase water efficiency in the gravity-fed system. Incorporating adjustable flow emitters can further enhance water efficiency by accommodating varying plant needs and conserving water effectively.
Frequently Asked Questions
Why Are Rain Barrels Illegal in Some States?
In some states, rain barrels find themselves ensnared by intricate legal restrictions, as laws argue that rainwater belongs to the sky’s whims. Environmental concerns and homeowner regulations create a labyrinth, making rainwater harvesting a frustrating endeavor.
How to Build an Irrigation System That Is Fed via Gravity?
To build a gravity-fed irrigation system, one must consider gravity flow and water pressure in their irrigation planning. This sustainable gardening approach enhances rainwater utilization, ensuring efficient water distribution for plants while minimizing resource waste.
What to Use to Elevate a Rain Barrel?
To elevate a rain barrel, one can utilize rain barrel materials such as cinder blocks or wood for DIY support structures. Elevated stand options enhance gravity flow benefits, optimizing rainwater collection efficiency and effectiveness.
How High off the Ground Should a Rain Barrel Be?
“An ounce of prevention is worth a pound of cure.” Rain barrel height considerations should range 24 to 48 inches, maximizing gravity flow mechanics, enhancing rainwater conservation benefits, and integrating effective DIY rain barrel tips for ideal elevation strategies.