As an Amazon Associate, we earn from qualifying purchases. Some links on this site are affiliate links at no extra cost to you. Our recommendations are based on thorough research and editorial judgment.
Installing a DIY Drip System for Hanging Baskets
Installing a DIY drip system for hanging baskets offers adjustable watering solutions that provide consistent moisture and conserve water. Gather necessary tools such as scissors and supplies, including 1/2 inch and 1/4 inch poly tubing, emitters, and a water timer. Plan a layout, connect the timer to an outdoor faucet, and add branch lines with couplers. Test the system for leaks and adjust emitters based on plant needs to guarantee efficient watering. Further details are available to enhance your system’s effectiveness.
Key Takeaways
- Plan your layout by creating a Watering Plan Map to efficiently route drip tubing to all hanging baskets and pots.
- Utilize 1/2 inch and 1/4 inch poly tubing, couplers, and a water timer for an automated, customizable watering system.
- Install backflow valves and pressure regulators to maintain water quality and consistent pressure for optimal irrigation.
- Space emitters 6 to 12 inches apart, adjusting flow rates based on plant needs, to deliver consistent moisture.
- Regularly inspect and maintain the system for leaks and clogs, ensuring an effective and efficient watering routine.
Benefits of a Drip System for Hanging Baskets
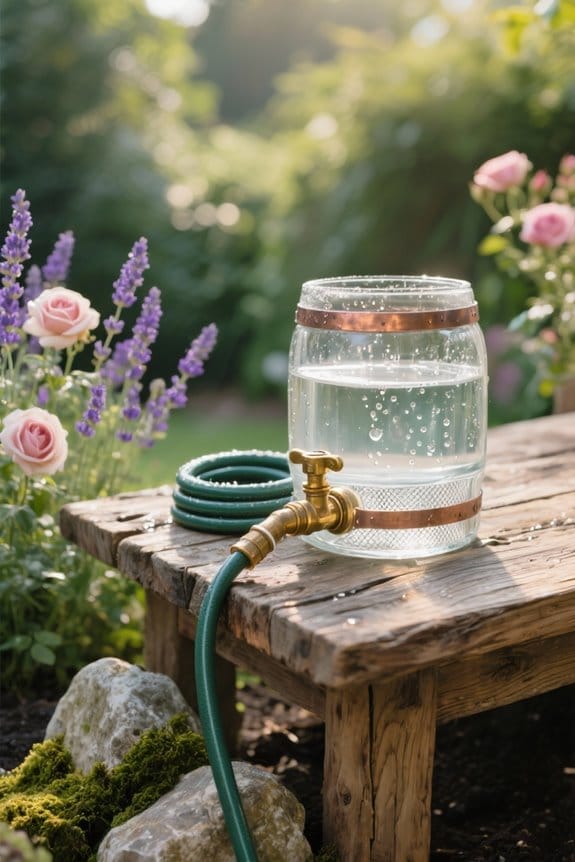
When considering the advantages of using a drip system for hanging baskets, gardeners will find that this method offers numerous practical benefits. A drip irrigation system delivers consistent moisture, ensuring that plants are adequately watered without manual effort. This automatic drip irrigation method conserves water, directing it precisely to the roots and minimizing evaporation and runoff. In addition, customizable emitter options allow for tailored watering suited to various plant types, enhancing growth potential. Integrating automated timers enhances this watering system, enabling scheduled watering that adapts to changing weather conditions, typically operating multiple times per week, depending on the season. Moreover, the straightforward installation and maintenance make this system an accessible choice for gardeners, simplifying their plant care routines effectively. An important consideration is incorporating anti-siphon valves to prevent backflow contamination, ensuring the safety and quality of water used in irrigation systems.
Required Tools and Supplies

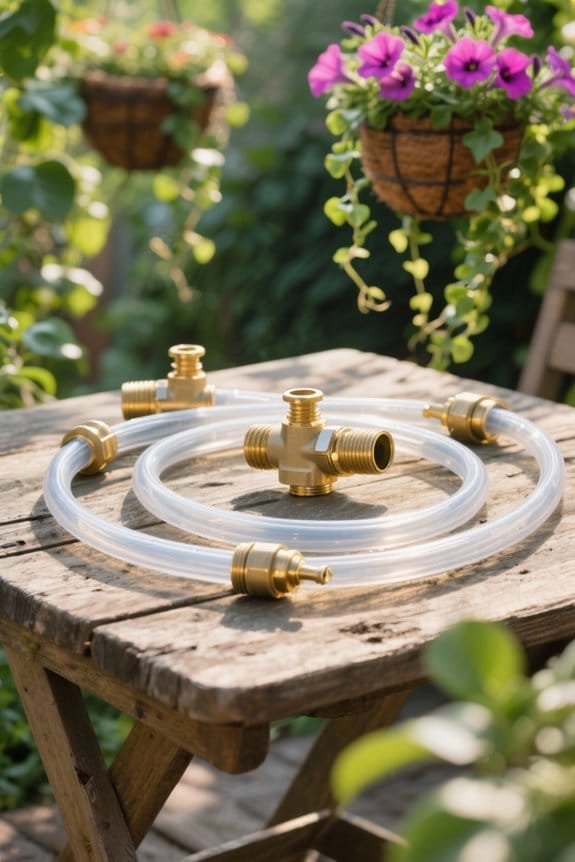
To create an effective drip system for hanging baskets, one must gather specific tools and supplies that facilitate installation and operation. Essential tools include scissors for cutting tubing and a hammer for securely fastening supports to walls or ceilings. Required supplies comprise 1/2 inch and 1/4 inch poly drip tubing, along with adapters, couplings, elbows, bubblers with stakes, and a water timer for automated watering. A hose adapter to connect the system to an outdoor faucet is also vital. A pressure regulator is necessary to maintain consistent water pressure. It is wise to keep extra couplings on hand for repairs and consider using Goof Plugs to seal unintended holes in the tubing, ensuring efficient functionality. For those wanting to grow plants with specific nutritional benefits, consider integrating American Purple Top Rutabaga Seeds into your garden, as they are an excellent source of vitamin C and have a sweet, subtly spicy flavor.
Recommended Products

MATERIAL: Made from premium grade white polyethylene (PE), this tubing offers durability and long-lasting performance for irrigation applications.


Standard 3/4" Garden Hose Thread Connections
Planning Your Layout
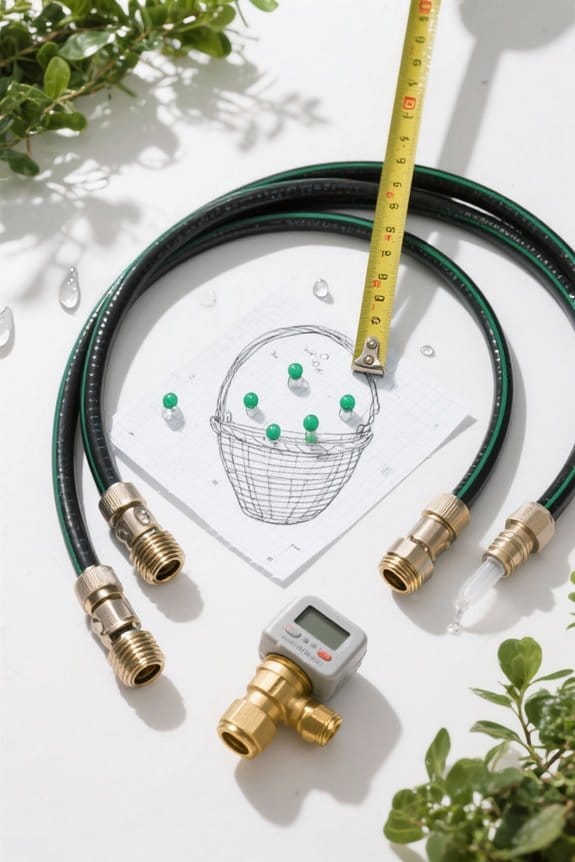
A well-organized layout is essential for an effective drip system, as it directly influences both functionality and aesthetics. Start by creating a Watering Plan Map to identify all hanging baskets and pots needing automated watering. Note their locations relative to the hose spigot to determine tubing lengths and routing efficiency. Assess the proximity of each plant to avoid obstacles like stairs and furniture while minimizing tubing use. Also, calculate the total number of watering locations to guarantee adequate supplies, such as tubing and emitters. Select appropriate pre-made drip irrigation kits, which often include necessary components for easier setup. Plan your layout to conceal tubing along porch ceilings or walls, enhancing the visual appeal of your hanging garden while guaranteeing effective watering. For optimal results, consider using ergonomic gardening tools to assist with the installation process, reducing strain and enhancing precision.
Connecting the Timer System
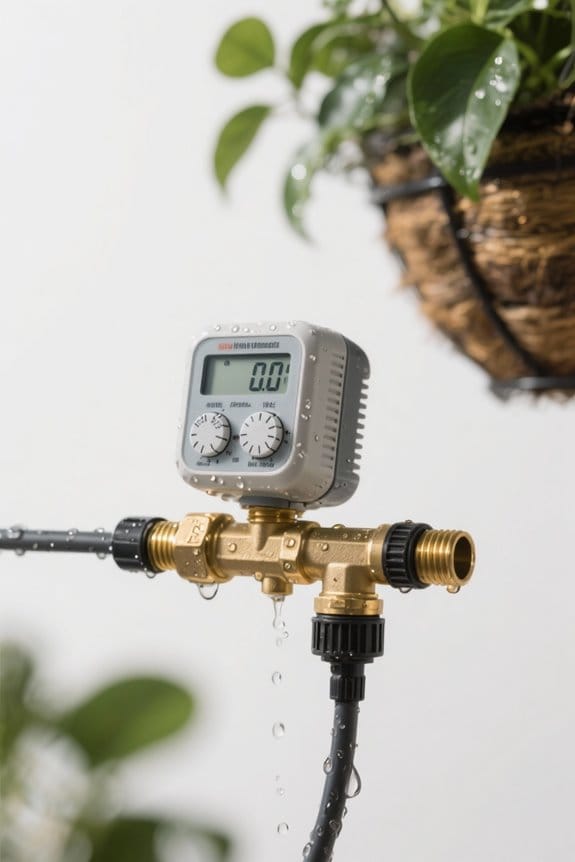
Connecting the timer system is a pivotal step in creating an automated watering solution for hanging baskets. Begin by inserting batteries into the irrigation timer, making sure it is securely attached to the outdoor faucet to prevent leaks. Program the timer according to a watering schedule, often set for every other day, customizing the frequency based on weather conditions. Next, connect the 1/2 inch poly tubing directly to the hose adapter on the timer by pushing it into the fitting until it reaches the required depth for a secure seal. Additionally, utilize a pressure regulator and filter on the timer’s input side, maintaining proper water pressure while preventing emitter clogging. Regularly check the timer settings to guarantee maximum watering efficiency. Many smart sprinkler timers utilize local weather data to optimize watering schedules, enhancing water conservation and promoting healthier plant maintenance.
Recommended Products

Complete 3-in-1 Solution: Single unit combines filter, 30 PSI pressure regulator, and Drip-Lock adapter in one compact design; eliminates multiple connection points that can leak

Remote control ready compatible with crr (contractor residential remote) remote series

Along with 1 x 1/2" Figure 8 End + 10 x Drip Tape Row Starts + 10 x Drip Tape End Plug + 1 x Drip Tape Coupler + 10 x 1/4" Goof Plugs (1 x 10 pack) + 1 x Punch Tool + 20 x 1/2" Hold Downs - (2 x 10 pack) + 1 x Galcon Bluetooth Flip Open LCD Timer . Ideal for Row Crops and Garden Beds needing low pressure , low volumes of water.
Measuring and Cutting Tubing
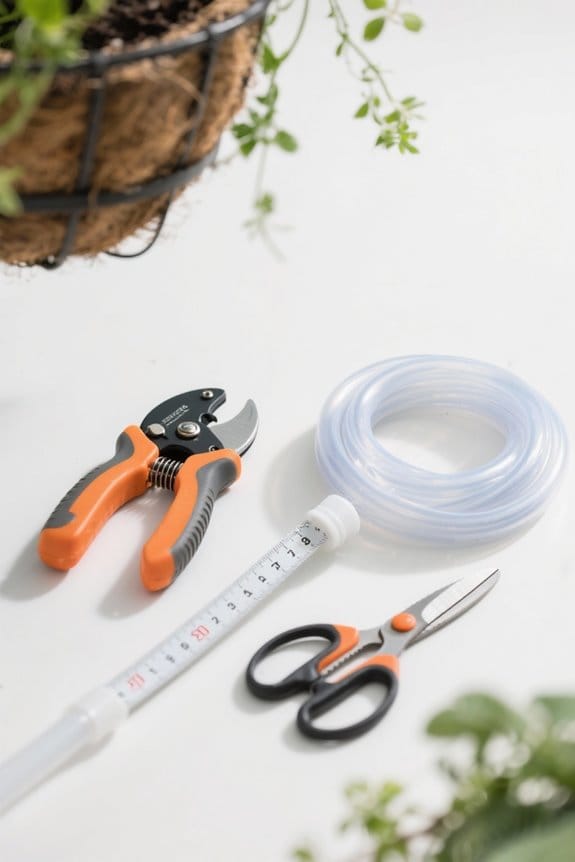
Before cutting the tubing for the drip system, it is vital to measure the distance from the water source to each hanging basket accurately. This process involves determining the necessary lengths for both 1/2 inch and 1/4 inch tubing. For the individual basket connections, the 1/4 inch tubing should be cut with an additional 1.5 to 2 feet left for flexibility in positioning. It is advised to use scissors designed for plastic, as they provide clean cuts without jagged edges that could impede water flow. If the design requires 90-degree turns, using elbow connectors is recommended to maintain ideal water flow without creating kinks, while double-checking measurements before cutting is significant to minimize waste. When installing a drip system, adjustable flow emitters can be used to accommodate different plant needs and ensure efficient water use.
Recommended Products

Installing Backflow Valves
Integrating backflow valves into the drip irrigation system is necessary for ensuring water quality and compliance with local regulations. A backflow valve prevents contaminated water from flowing back into the main water supply, thereby protecting drinking water. During installation, it should be positioned upstream of the pressure regulator and filter, allowing for ideal filtration before water enters the drip system. These valves generally operate automatically, allowing water flow in one direction and closing to stop backflow when pressure decreases. Regular maintenance is essential; inspect backflow valves annually for wear or damage, ensuring reliable performance. Moreover, in many regions, backflow prevention devices are legally required, making their installation crucial for public health and safe irrigation practices. Atmospheric Vacuum Breakers offer effective backflow prevention for potable water systems, providing a reliable solution to maintain water safety.
Recommended Products
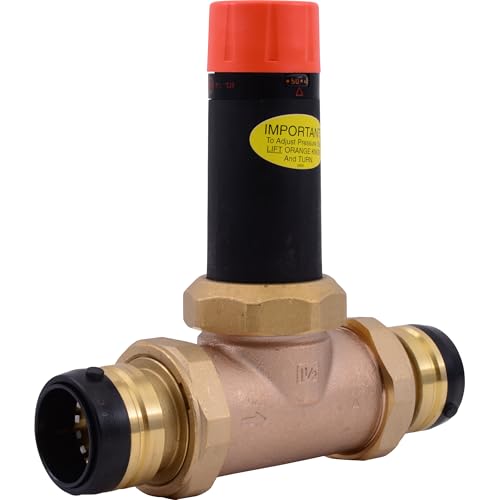
WATER PRESSURE REGULATOR: Helps to regulate downstream pressure in commercial and residential water applications, and features a patented single cartridge design which enables servicing without having to remove the valve body


Flush Tool (FLUSH) provides easy line flushing, saving up to 15 minutes per installation
Running Main Tubing to Primary Locations
Mapping the layout of hanging baskets is essential for installing the main tubing efficiently. Start by determining the most practical path for the main line to connect from the water source to each basket location. Utilize 1/2 inch poly tubing, guaranteeing it spans the necessary distances without excess slack. Secure the tubing along walls or ceilings with pickup talons or stakes, promoting a neat appearance and minimizing trip hazards. At key junctions, install T-couplers or elbows to redirect water flow toward individual hanging plants or accommodate 90-degree turns. After completing the installation, thoroughly check each connection point for leaks, making any necessary adjustments. This careful approach guarantees effective water distribution and keeps all hanging plants properly hydrated. Consider using UV-resistant materials for your tubing to ensure prolonged durability and resistance to extreme weather conditions.
Adding Branch Lines With Couplers
Adding branch lines with couplers enhances the efficiency of a DIY drip system for hanging baskets. To facilitate this, T-couples or elbow couplers can be used for sharp directional changes in drip tubing. Begin by inserting barbed couplings after using a hole puncher to create openings in the main 1/2 inch line, allowing the 1/4 inch tubing to connect securely. Straight couplers are effective for extending tubing lengths and must be attached to straight runs for a streamlined layout. Each coupler should fit snugly to prevent leakage; it is essential to guarantee that the tubing reaches the stop of the coupler. Regular inspection of couplers and branch lines is necessary, as clogs can impede the irrigation flow to the baskets. Incorporating high-efficiency nozzles in your drip system can further enhance water conservation by optimizing flow rates and reducing water waste.
Recommended Products

LDPE - Low Density Polyethylene

Fits over barbed outlet ports and all Xerigation emission devices and 1/4 in. transfer fittings

Rain Bird Drip Irrigation 1/2" (0.7" OD) Blank Distribution Tubing
Positioning Emitters for Effective Watering
Proper emitter positioning is integral to the effectiveness of a DIY drip system for hanging baskets, following the installation of branch lines with couplers. Emitters should be spaced approximately 6 to 12 inches apart along the 1/4 inch drip tubing to guarantee even water distribution. For peak watering, the flow rate of the emitters must be adjusted based on plant needs, typically ranging from 0.5 to 2 gallons per hour. Placing emitters at the base of each plant directs water to the root zone, which minimizes evaporation. Additionally, various types of emitters, such as bubblers or drip stakes, can accommodate differing water requirements. Regular monitoring and repositioning of emitters are essential to adapt to plant growth and changing moisture needs. Drip irrigation hoses play a crucial role in conserving water, saving up to 80% compared to traditional methods, by delivering moisture directly to the roots.
Testing Your Drip System
How can one effectively guarantee their drip system operates as intended? Begin by turning on the water source gradually to detect leaks, making certain all connections are tightened to minimize water wastage. Next, observe the flow rate from each emitter, confirming that water is distributed evenly across all hanging baskets. If any plants appear dry, make necessary adjustments to the positioning or flow rates of the emitters. Periodically check for clogs, using a fine wire to dislodge any debris that may impede water flow. Regular monitoring of the system’s overall performance will help identify issues early, allowing for timely adjustments or repairs to maintain ideal effectiveness. This process ensures healthy plant growth through a reliable watering system. For optimized performance, ensure the system’s water pressure stays within the ideal range: 30-85 PSI.
Maintenance and Troubleshooting Tips
To maintain an efficient drip system for hanging baskets, regular inspections and proactive adjustments are essential to guarantee peak performance. First, monitor the system by turning on the water source and checking for leaks at all tubing connections. Next, inspect emitters for clogs by observing water flow; clean using fine wire as needed to maintain consistent irrigation. Additionally, adjust the flow rate of emitters as plants grow, ensuring each one receives adequate moisture based on its specific needs. Periodically, check and clean filters in the timer or system to sustain ideal water pressure. Finally, for seasonal maintenance, consider removing or winterizing components during colder months to extend the system’s functionality and longevity, safeguarding your investment.
Frequently Asked Questions
How to Install a Drip Irrigation System for Hanging Baskets?
To install a drip irrigation system for hanging baskets, one must consider drip line placement, carefully select emitters, establish a reliable watering schedule, and guarantee regular system maintenance for ideal plant hydration and health.
How Many Drip Emitters per Hanging Basket?
Typically, one to three drip emitters per hanging basket suffices, depending on size and plant needs. Drip emitter types affect basket watering frequency and water distribution methods, ensuring suitable moisture for diverse hanging basket plants.
How to Stop Water Running Through Hanging Baskets?
To stop water running through hanging baskets, implement effective drainage solutions, optimize soil composition for water retention, and choose appropriate basket designs that incorporate drainage holes, ensuring moisture regulation without leading to overflow or waterlogging.
How to Attach Drip Tray to Hanging Plant?
Attaching a drip tray requires choosing suitable drip tray materials attached securely, perhaps with screw hooks. Meanwhile, basket drainage options and water retention methods guarantee efficient plant nutrient delivery, contradicting the initial belief that hanging plants need no extra care.